Start exploring with our event planning software FREE trial
We recently unveiled Iventis 2.0, our newest iteration of the Iventis event planning system. Did you miss the launch? Read all about it here!
The Iventis platform has been a trusted tool for organisers in the major events industry for years. However, we know it takes time to explore event management tools and really understand the breadth of features they allow. That’s why we launched our event planning software free trial, through which you can try the Iventis Planner for 14 days, no credit card required.
When you sign up for the free trial, you gain access to a variety of event planning tools within one platform. But how can you be sure to make the most of your 14-day free event planning software? Read on for the top planning features you need to explore in order to make the most of your free trial.
Getting started
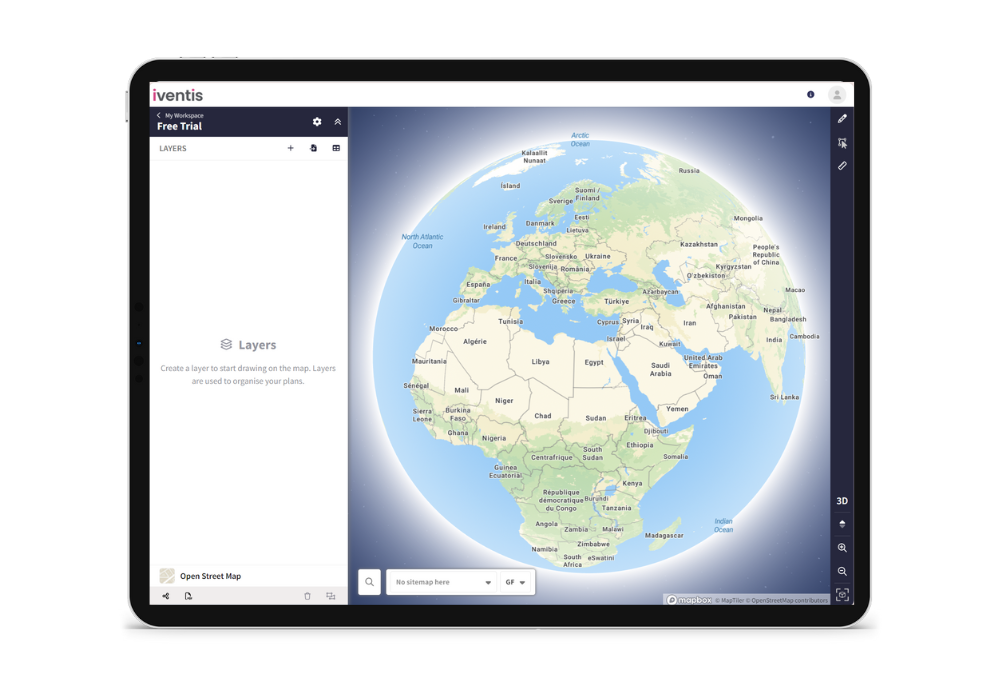
If you haven’t already, the first step in getting started is to register for your Iventis event planning software free trial. The sign-up process is quick and easy – just enter your details and you’re ready to start exploring the Iventis Planner! You’ll receive an invitation to access the application, where you can sign into your trial account and begin your first project.
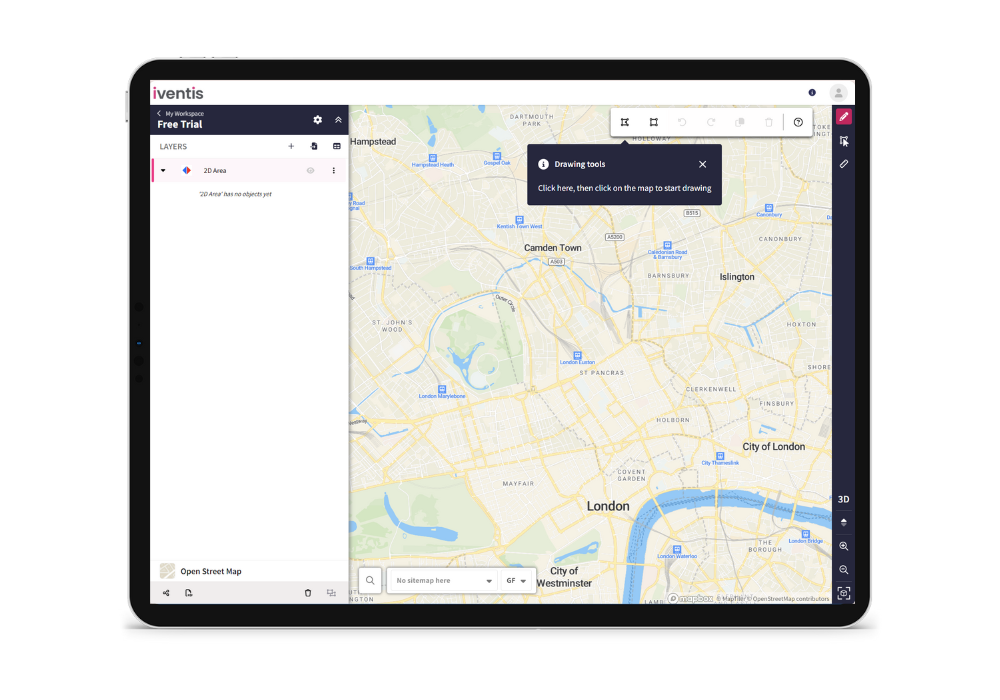
Once you open your first project, you’ll see a series of helpful pop-ups that explain how to make your first plan.
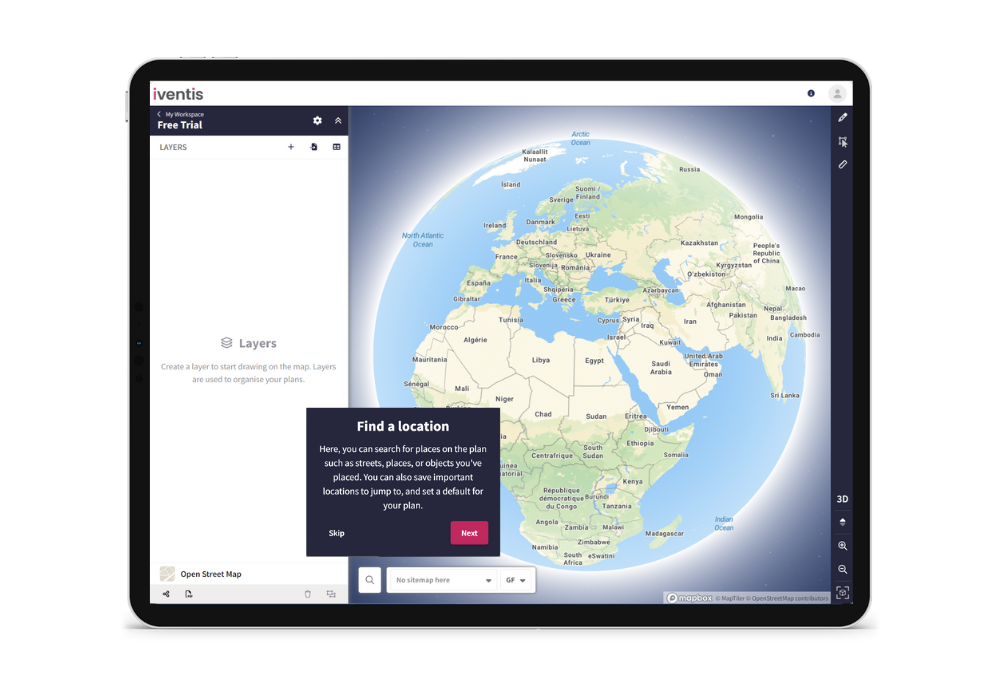
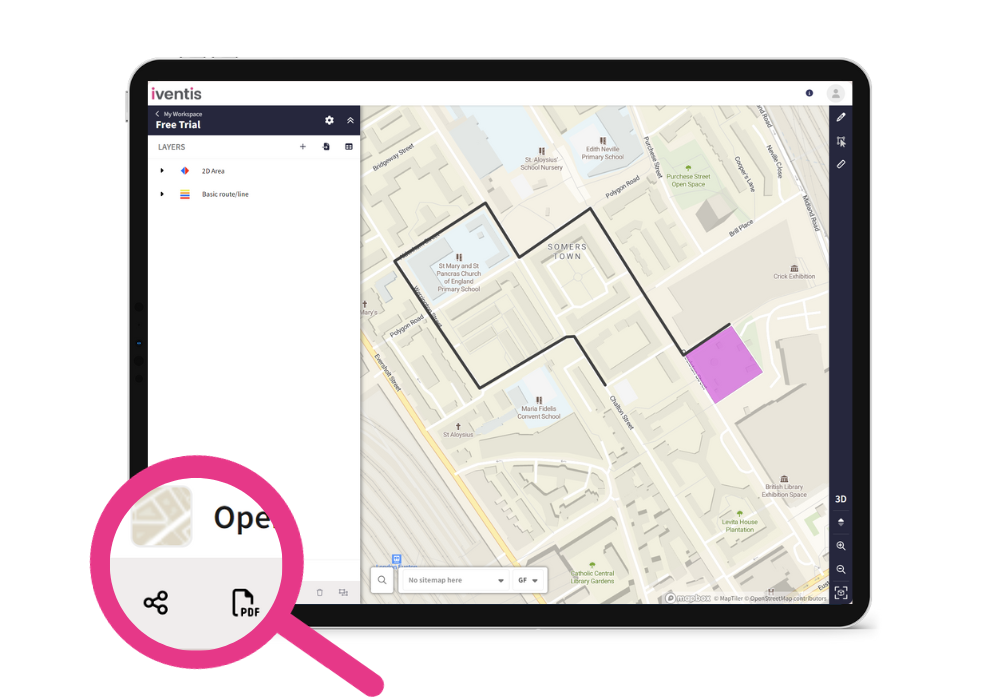
First, you need to choose a location to act as the base of your plan. You can still move around once you’ve picked it, but this will be the position the map defaults back to whenever loaded. If you are planning an event in central London, for example, it makes sense to base your map there. By clicking on the magnifying glass in the bottom left corner of your map, you can “create a new saved view”.
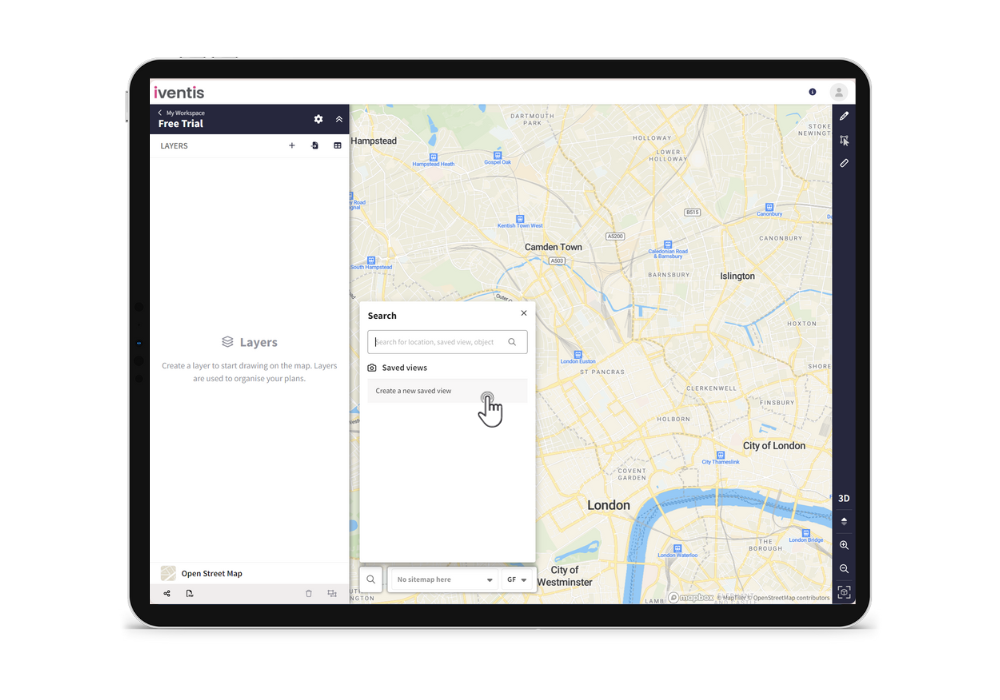
After saving your view, you can choose your base map from our range of options, including Ordnance Survey, Bing Satellite, Open Street Map and more. After that, the world really is yours to explore! Discover our premade layers, add objects, draw routes, mark designated areas, or simply browse through the options and see where they take you.
Exploring the Planner
The features included in the Iventis Planner are what makes it such a complete tool for events professionals. Because of this, there are a lot of options available – which can be a little daunting for new users! If you’re feeling a little overwhelmed, here are some of our top features to try out to make the most of your free trial.
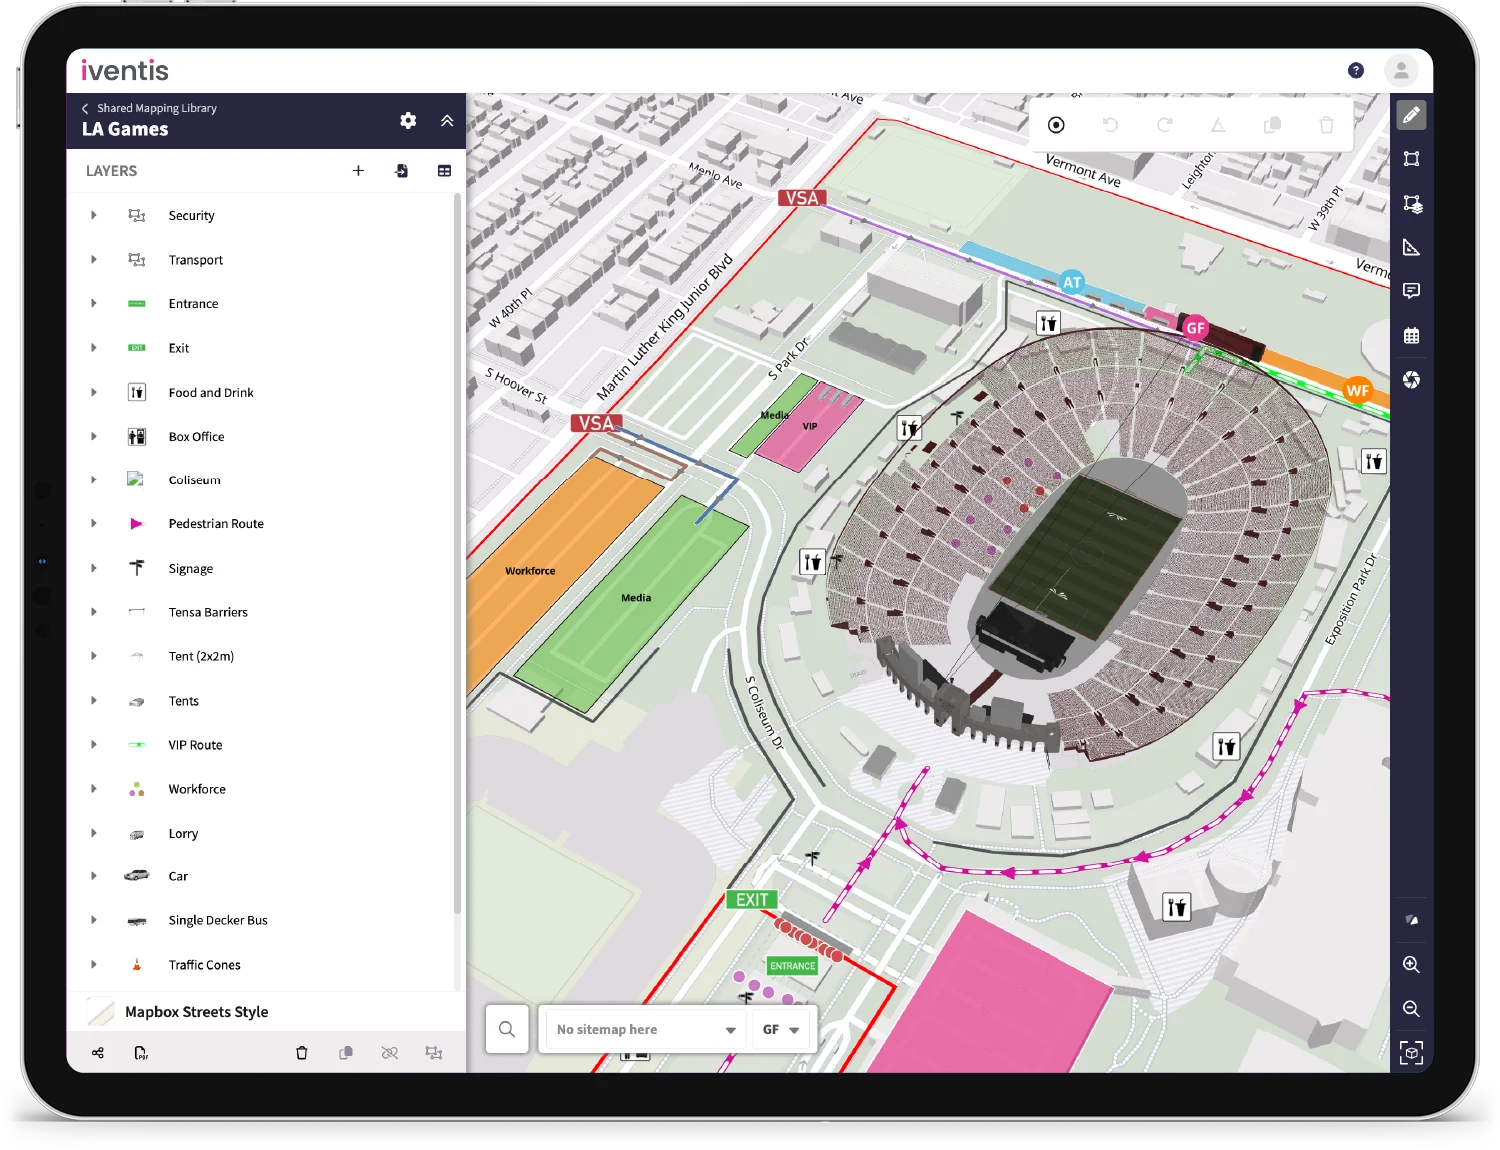
Layers
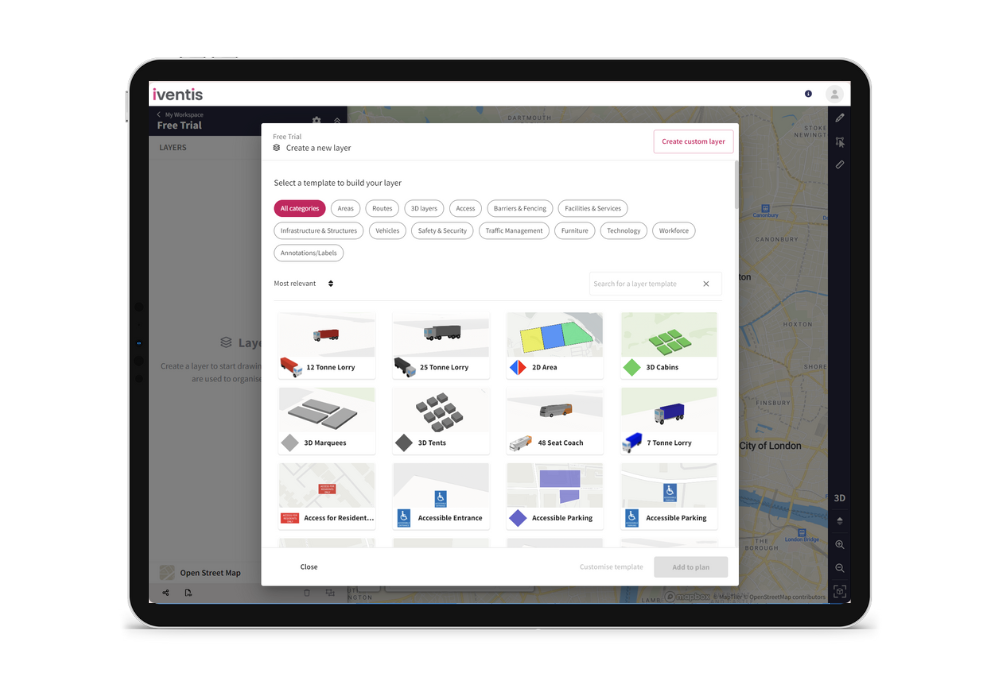
Layers make up the bedrock of your map, unlocking the ability to create plans, collaborate with your team, share with key stakeholders and analyse with complete precision. When you create a new layer, you’re able to choose from a variety of categories to help you decide which is the right type for your project. Looking for something specific? It’s also possible to make your own layers in Iventis, providing unlimited flexibility.
Planning a marathon? Start with a route. Organising an exhibition? You might want to begin by mapping out the access points of your venues.
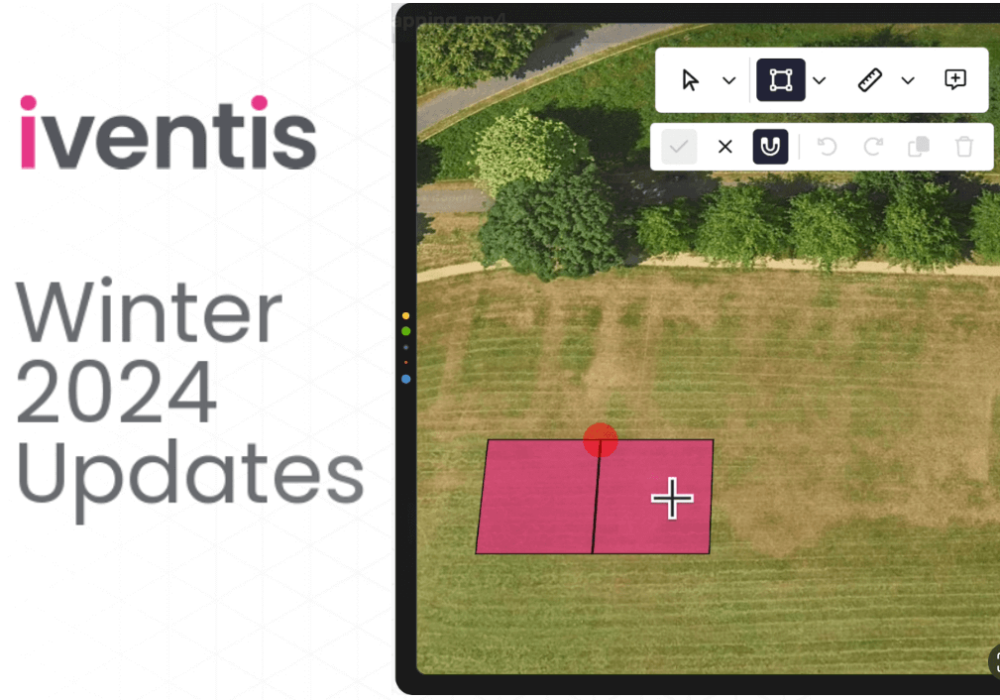
Area mapping
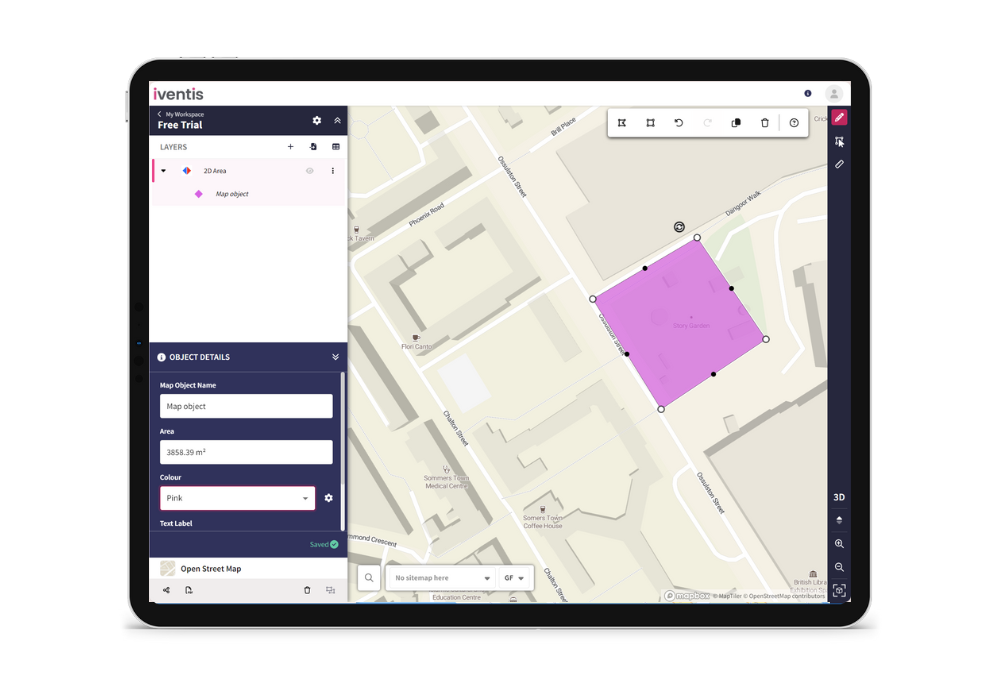
Say, for example, you’re looking to plot a car park for your event. You can do this by clicking on the “areas” layer category and choosing the “2D Area” function.
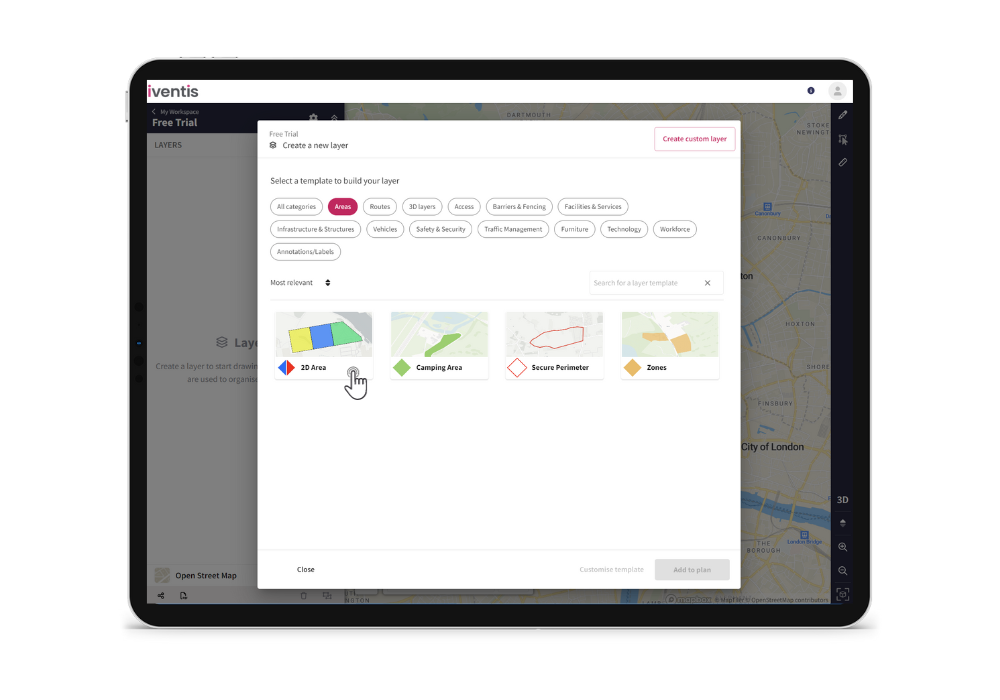
From here, you can choose the drawing tool in the top right corner and draw your car park. Whether you’re looking for a simple square or rectangular shape, or something more angular to fit a specific space, our drawing tools help make it as easy as possible to draw your area.
Once you’ve placed your car park, the object details will open to the left of your window. Here, you can name your shape, view its precise measurements, change its colour, or give it a label. These factors are referred to as ‘attributes’ and provide a range of customisable possibilities for your plan.
Routes
Almost everything must follow some form of route to access your event. That includes suppliers and visitors, and even involves ensuring there is an accessible route for emergency services, should they be required. This is even more crucial if you are planning something that heavily involves roads, such as a marathon, cycling, road race, parade or other street event. Luckily, Iventis makes route planning simple.
We offer a range of specific route types that help you to keep your plans separate, including walking routes, evacuation routers, VIP routes and more. You can access these templates from the new layer view or choose the basic route if you’d like a more multi-purpose option.

To start your route, click on the “draw” icon and click your starting point on the map. Move your cursor to create a route line and click again to confirm that portion of the route. Once you’re happy, you can press “confirm” in the top right corner, double click or press enter to complete your route.
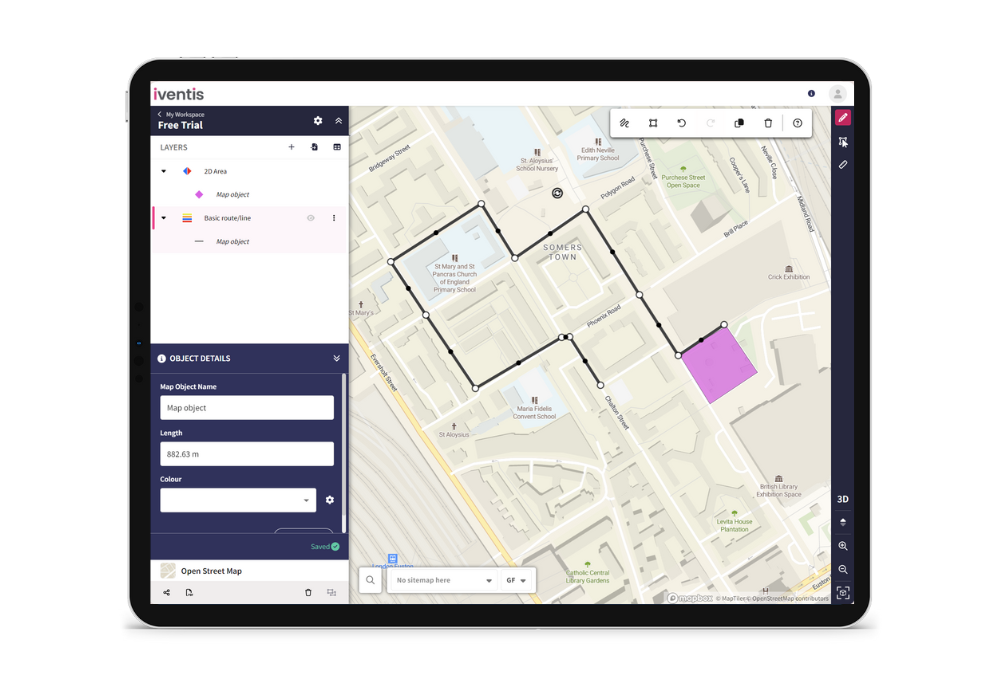
Once your route is confirmed, you’ll see the object details panel return to the left of your window. Just like the area layer, you can name your route, view its distance, and change the colour.
Icons and models
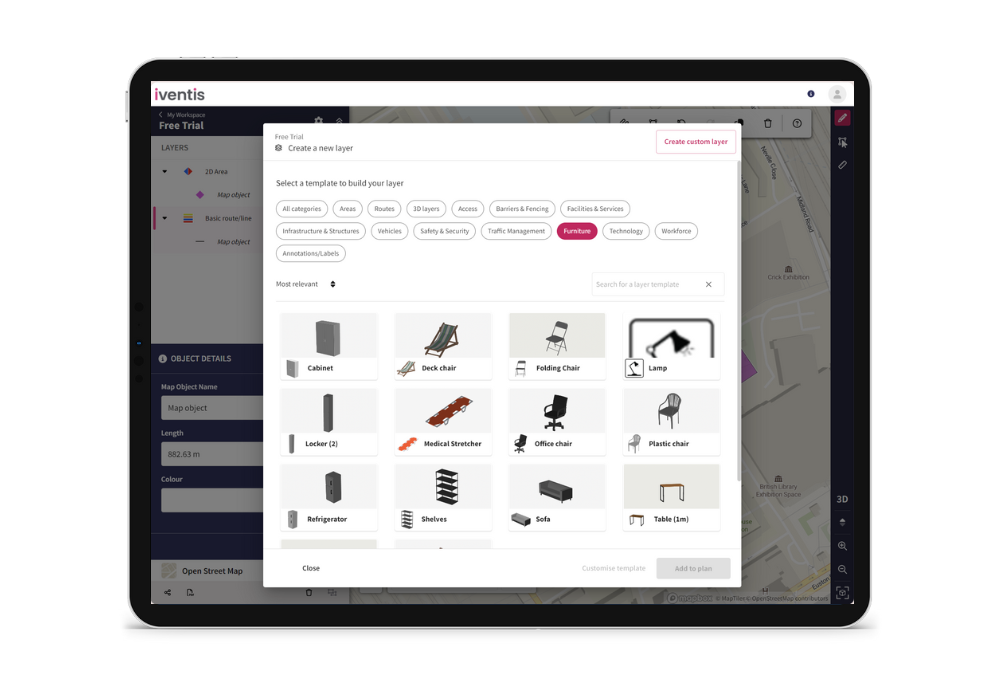
Event planning involves more than route planning and area mapping; it requires working with a vast range of intricate elements, from placing barriers for pedestrian and traffic control, to understanding the best locations for first aid tents, CCTV cameras or even portaloos. That’s why Iventis comes with thousands of ready-made objects that can be easily added to your maps, providing depth and detail when you need it most.
Accessing the objects is simple – just add a new layer as you did with the areas or routes and choose the kind of object you need. The layer categories can help you narrow down your search, or use the search bar if you’re looking for something specific.
Sharing your event
Sharing event plans is crucial for organisational success, so make sure you explore our sharing options during your trial. There are loads of ways to share your plans with team members, stakeholders and anybody else who needs it.
The two simplest ways to share your work is through the buttons to the bottom left of your app. Here, you’ll find a general sharing button, as well as an option for PDF export.
The first of these options allows you to move your plan from your personal workspace to a shared workspace with your team. When this happens, everyone invited to your shared workspace can view your map and collaborate if you want them to. In this view, users are also able to comment directly on your map, adding quick and easy insights or approvals in one version. This version is automatically updated as you amend your plan, ensuring that all parties have the most up-to-date information whenever they need it.
The other option provides you with a PDF export, which maintains the current version of your map while enabling you to share it as an offline PDF. This is perfect for providing oversight to stakeholders who need a general overview but do not need to be actively involved in the planning, or for those who prefer to work offline.
The PDF is created from your current plan view, rather than the base map that you set earlier in your process. Planning a city-wide event, but exporting a PDF for a stakeholder of a specific venue? Zoom in so that only the objects, routes etc., applicable to that venue, are showing. This offers added flexibility, allowing you to tailor the elements of the map that are visible in the PDF and streamlining the experience for external stakeholders.
Ready to get planning?
The Iventis Planner free trial is offers a complete overview of the software, during which you can really explore the features available. We’ve touched upon the basics of how to create your first event plan, but there’s so much more for you to discover within the Iventis Planner. For more tips and tricks to help you experience everything the Iventis Planner has to offer, visit our Knowledge Base.
So, are you ready to begin? Sign up for your free trial today and get stuck into a better visual event planning experience.